Monday, November 17, 2008
Another SeattleHomes Mention
I just found this. Here a little image of one of my paintings at a new store in the Seattle area. You can't really see much of it, but it is this one blogged previously. It is 'Overexposed' 36'x 48'.

Sunday, November 16, 2008
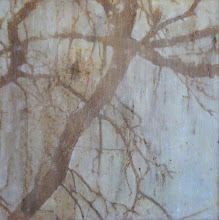
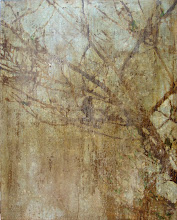
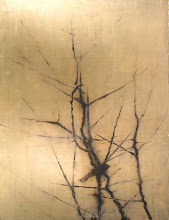
Dallas Condo
 original concept sketch
These are images of the early stages of a larger scale graphic on the bedroom walls of a condo we are finishing in Dallas. The condo is very modern in style with some really great art already hanging. It is furnished with a minimal aesthetic, but we finished all the walls in a slightly burnished plaster to soften what sometimes becomes a bit of a n institutional look, without cluttering it up. We are constructing this installation in the master bedroom of multiple plaster colors, with a subtle striae pattern. The plaster in applied around the masking then sanded back down to reveal the detail then polished to soft sheen. I have some images of some walls I previously installed in offices in San Francisco, if any one is interested. Again, I have some frustration that much of the details that make this finish so great have eluded all photography thus far. The absolute best part of this finish is its Tactile properties; unbelievably smooth. I selected the wall in this location to particularly take advantage of this. passage through the bedroom to the bath and dressing area will bring the resident or any guests close enough that they will find themselves with their hands on it frequently.


Wednesday, November 12, 2008
display walls
We have been working on a couple of free standing walls for display at local carpet and rug retailer, Regency Royal. They have a truly amazing space, and products. If you are at all interested in design or decor, next time you are in Salt Lake City, you have to stop by there for at least a few minutes. You will be amazed.
The first two images are of a side of these walls we are finishing with an inlaid plaster. The first image is the vinyl masking. I kind of wish I had gone a little larger scale. with the pattern, and I have redrawn this pattern since, making the pattern more open (more of the background between the pattern) and changing the curves and points to make it a bit more dynamic.

This second image shows the filled stencil being removed. the khaki inlay color isn't as green as it looks in the photo. There area few more stages that level out the surface, hopefully it will be done by the time I get back from Dallas and I can get some pictures of the finished product.

This this image is a side completely covered with copper leaf that we chemically aged to a bright patina.

This is the other side of the patinated copper leaf wall above. This side has the same copper leaf applied over an olive green plaster, in a large scale oak leaf graphic, and finished with a similar patina. I really like how the plaster amsorbs someof the blacked copper creating a slightly darkened shadow around the copper.

We have been working on a couple of free standing walls for display at local carpet and rug retailer.
Tuesday, October 21, 2008
Some Exciting News...well, Maybe.
Looks like I will probably be involved in the remodel of a soon to be reoccupied (different resident) apartment in this building, here in Salt Lake City, UT. We have come up with what I think are some great ideas for this space, with a very generous budget, so I am quite excited. In working with this group in the past, however, often some of what I thought were the best ideas don't quite, "make it through committee," so to speak. Nothing is confirmed. I hope to know more by next Monday. I will let you know as soon as it is a sure thing, if they don't give me instructions otherwise, and I will post pictures as the project develops, if they let me take them.


Wednesday, October 15, 2008
Finished Holy Family Catholic Church
All done, I still think the colors are a little strong.
 This is a close up that shows the sheen. We put a little burnish on the plaster.
 the last image shows the patterning of the two colors, though the camera on my phone didn't like the light level much.
 I should be getting some images from one of my employees soon that show all this much better.
 This is a close up that shows the sheen. We put a little burnish on the plaster.
 the last image shows the patterning of the two colors, though the camera on my phone didn't like the light level much.
  I should be getting some images from one of my employees soon that show all this much better.
Friday, October 10, 2008
Holy Family Catholic Church

Thursday, pretty much everything is moving forward. The polished yellow plaster is done. The dark red is just the paint for under the plaster the small area near the floor, behind the alter is the terracotta color all that red will be. That area is completed as well. Hopefully we will be all done today.
Thursday, October 9, 2008
 Day 2 or is is 3, I don't know. I haven't really been sleeping. I'm trying to finish a painting for a contest before the cut-off on Friday- oh tomorrow I guess - well that isn't going to happen...On site the trim is painted in a bright gold and the polished yellow plaster on those skirt
type areas is prey much done too.
Tuesday, October 7, 2008
Holy Family Catholic Church

This is a proposed job in Ogden. The trim is to be a painted gold metallic. The space between the trim and the shaded area is to be a bright yellow, two-tone plaster,fairly polished. The shaded are will not, in fact, be anything that would fall under anything what accurately be called by the "F" word above. The image above was sent to me. I did NOT write the caption. This shaded area is to be a darker rust and yellow two-tone plaster not as polished. I am hopping to update with progress photos as we go. In warning, the colors are significantly stronger than I recommended, but the client was sure that was what he wanted.

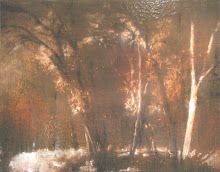
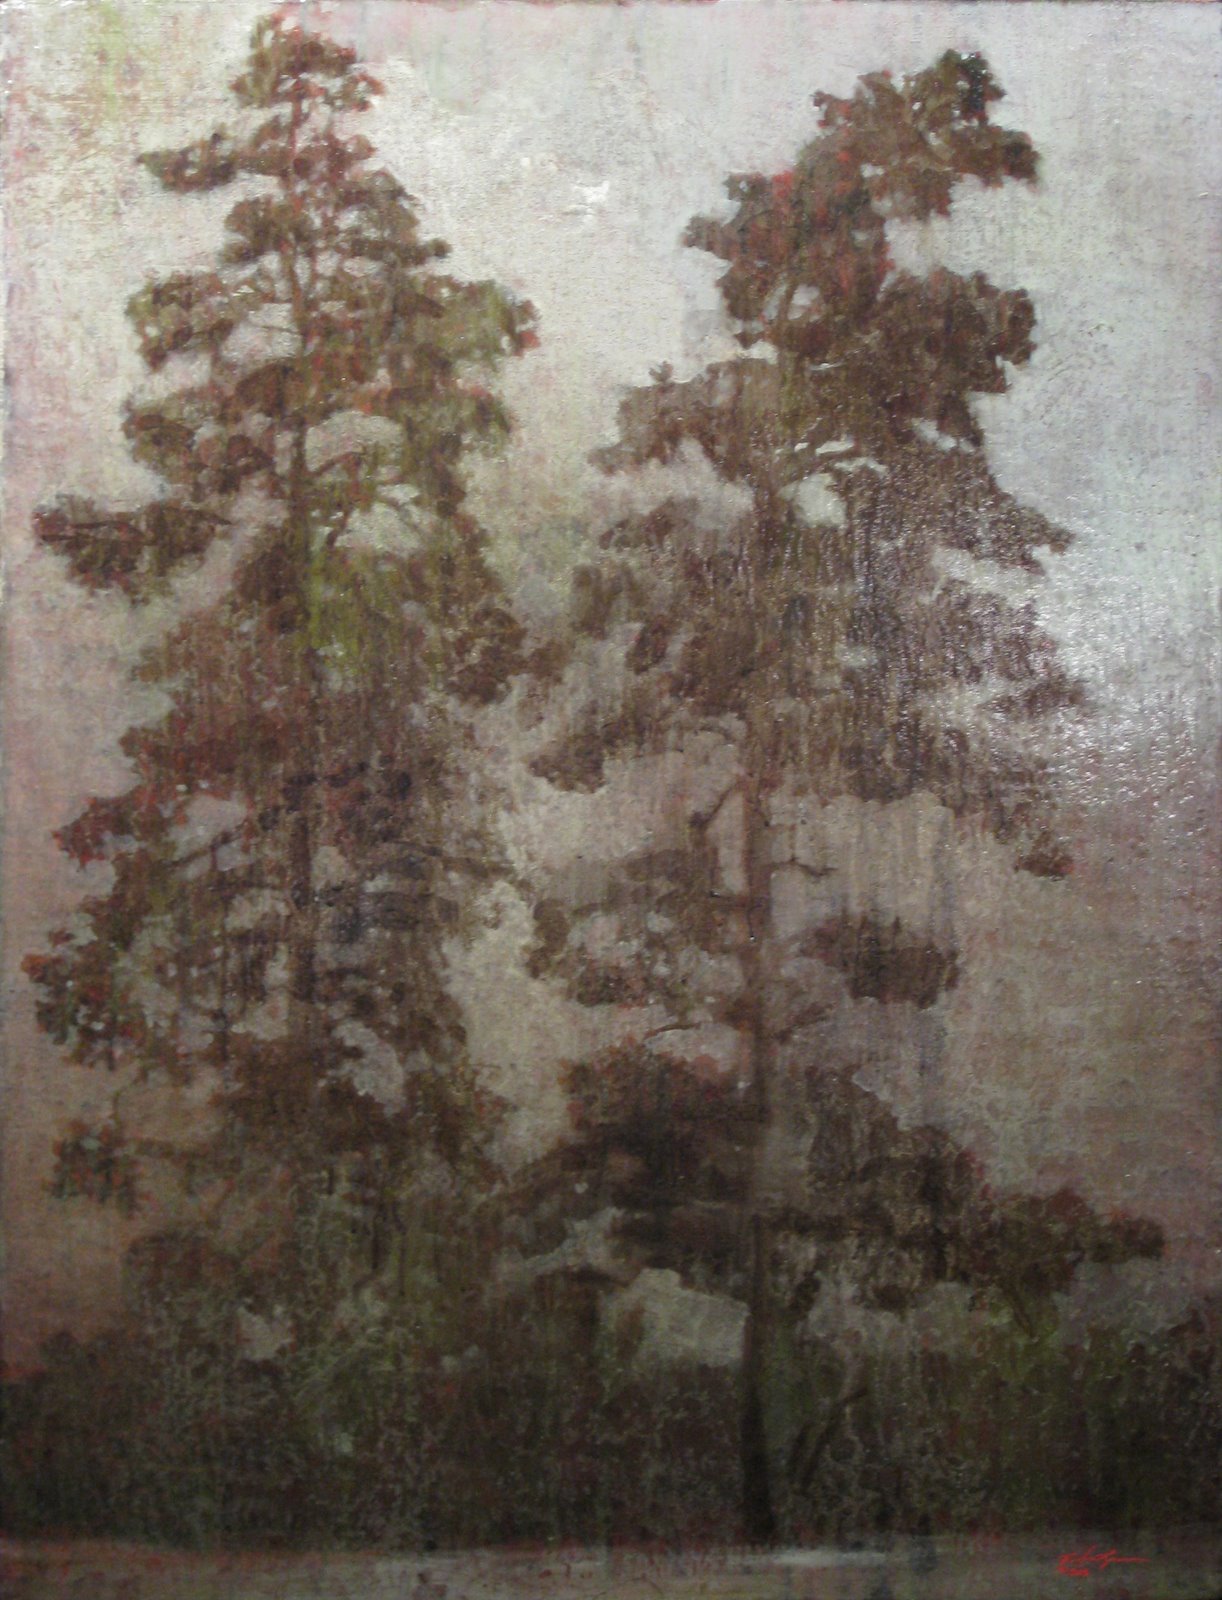
'Grove' 60" x 36" and 'Firs in Mist' 48"x60"
 Here is a continuation of my Pine tree series. I actually completed these last week but have been getting my most recent works photographed professionally prior to delivering them to any galleries. Shawn (Elton) Young helped me produce some promotional postcards. I will put in a later post. My plan is to produce postcards for each of my larger available pieces, and mail them to everyone on my mailing list. I hope this isn't going to feel like more "junk" mail to anyone. Any of you think that should be a concern to me? If any of you would like to be on this mailing list or if you know anyone who would like to be included, I would be happy to do so . There is contact link on my website, just give me the necessary information and I will be sure you (or they) are added. Oh that website has been just updated too if any of you are interested.
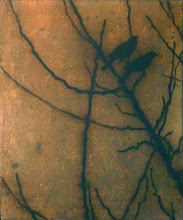
Saturday, September 27, 2008
'Magpie in Aspen (blue-green)' 48" x 60"

I actually finished this piece last week. I have set a goal to finish 3 paintings a week. I have found that when I am under pressure, I tend to have more success. This week however I was able to finish exactly ... zero, paintings. I have two quite close...
Tuesday, September 9, 2008
Encroachment 18" x 24"

I am little embarrassed to even post on here again after so long. It has been a fairly normal summer for me; meaning, pretty much, total chaos. I finally finished another piece.
Wednesday, June 25, 2008
'Catalpa' 60"x48"

I have always loved these overlooked trees. Rarely have a I ever seen this tree on the "right side of the tracks". Usually it is the tree that springs up in the poorest neighborhoods (some of which are becoming more desirable). I have seen it growing right up through the middle, and out the window of a row-house in southeast Washington, DC and in slag piles in Oakland, CA.
Unfortunately, I often see their naturally, characteristic conical crowns, truncated for overhead power lines. Their beautiful blooms, huge leaves, and the long bean pods (seen in the painting), have always drawn my attention.
Monday, June 23, 2008
The New "finished"

So this is where they had us take the mural. I still think it looks good I just liked it better more simple and sleek. Leaving it the old "finished" also would have saved them several thousand dollars.

Thursday, June 5, 2008
Bunk Room
These are pictures of the "finished" bunk room mural. Except that the homeowners "like it so much" that they want to add a lot more detail. There was nothing the designer or I could say to convince them that it really is done. I think usually the lower the detail contrast, the better - for a residential mural. I think in a residence the exposure is protracted enough that for the discovery process to continue, you need to not be able to see all the details without really looking. In fact, some of the best murals become more of just a pattern and most viewers don't really notice them right away. Well they probably notice there is a mural but not really what the mural is of.


Tuesday, May 27, 2008
Vemont still.
I will be sleeping in my own bed tonight (and for at least the next 2 nights! whoo-hoo!) here a few shots of the room after we got up the stars.


And some images of a bathroom there where we added some circles.


And a image of a typical Vermont residence. This is not the guest house we are staying in.


And some images of a bathroom there where we added some circles.


And a image of a typical Vermont residence. This is not the guest house we are staying in.

Sunday, May 25, 2008
Vermont

So I am here in Vermont again. I am hopping to get this Telescope silo finished up this time. There was a lot of repair since they had us do the plaster stripes prior to finishing the trim. In addition we are putting the same plaster on some removable panels on the ceilings of the connection area between the house and the silo. Then we are putting stars in random coin sized stars on the walls and ceilings. These are a few images prior to the gold stars. I think we will be done with the stars by tomorrow so I will put some final images up then. The colors in these images are really washed out, the fire-engine red isolating shaft will still look a little out of place till the gold stars are in. I think you can tell from the image it is a highly polished automotive finish.


 Also included are images of the inside of the observatory up where (the telescope is) dome. I painted this on a previous trip. I hope these aren't too dark to see anything. It is a kind of random pattern of simplified celestial objects airbrushed in automotive metallics in about 12 different colors.


Tuesday, May 20, 2008
originall layout

So here is what the original layout looked like. As you can see it was pretty much completely planned out before I started to put paint on the wall. Not included is the background pattern nor the colors, though we did work those out on full scale samples as well. All together well over 3 weeks worth of prep, for a mural that took three days to paint, and was up for a little less than a month before being painted over (what they usually do to showcase houses when they are done with the showcase).


Subscribe to:
Posts (Atom)